You might not know, but a crack team created Windows in just 24 hours who were also drunk….jokes aside, Windows is not very efficient at properly removing files and replacing them. Sometimes, you can uninstall your graphics card driver, be forced to restart just for Windows Update service to automatically install Microsoft’s generic driver before you’ve had a chance to move your mouse – annoying, isn’t it?
As a programmer, I don’t hold any faith in Microsoft’s InstallShield protocol. It is plagued by a variety of bugs such as my personal favourite, InstallShield not removing old files after uninstalling an application.
So, how can we combat Window’s inefficiencies and make sure our graphics card drivers are properly uninstalled as well as stop Window’s from installing generic drivers when you restart your PC?
By correctly removing every trace of your old GPU drivers and installing the fresh ones after, but, how can you do that?
How to Properly Update Nvidia or AMD Drivers
In this short GPU Guide, we are going to show you how to properly clean your system and prepare it for driver updates. Many people skip this important step!
Download Display Driver Uninstaller (DDU)


To properly remove all traces of your existing Nvidia or AMD graphics card drivers, you will need to download a program called Display Driver Uninstaller (DDU) which not only deep cleans your system of any existing files but will also enable you to stop Microsoft from installing any generic drivers which are not optimised for gaming or graphical performance.
To start, download the latest DDU release from the Guru3d website.
Once you have downloaded it, run the package and finish the installation. You can choose to Run Display Driver Uninstaller once completed.
Download Latest AMD or Nvidia Drivers
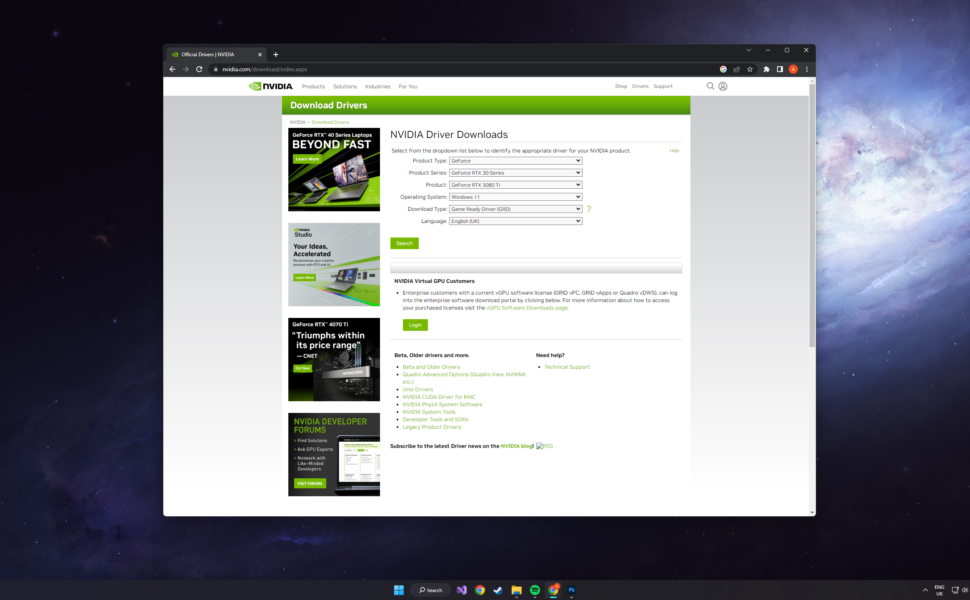

Before we can get started updating the graphics card drivers, we need to get the latest ones downloaded first.
For AMD users, you can download the latest GPU drivers here.
For Nvidia users, you can download the latest drivers here.
Once you have downloaded your drivers, you can move onto the next step.
Restart in Safemode
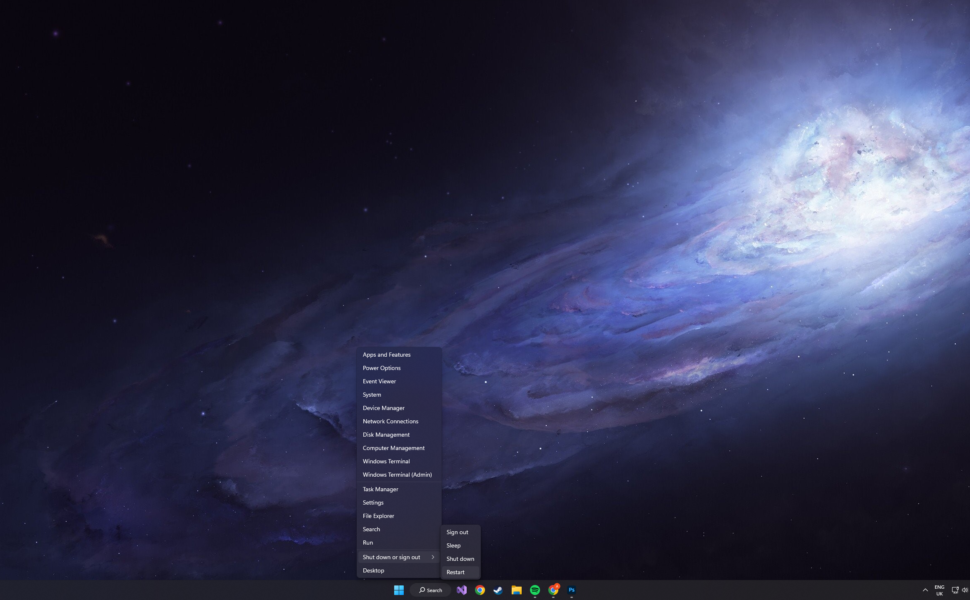

To prevent any conflicts or corruption, it is best to restart your computer in safe mode before you continue with upgrading your graphics card drivers.
How to restart Windows 11 in Safe Mode
- Open the start menu
- Click the power button
- While holding the SHIFT key, left-click Restart
- Wait for Windows to Restart
- Once restarted, select Troubleshooting
- Now click Startup Settings
- On the next screen, press number 5 to restart in Safe Mode with internet access.
You can choose to avoid this step, but you do so at your own risk and we cannot be held responsible for any data loss that may or may not occur during the process.
Open DDU & Select GPU Manufacturer
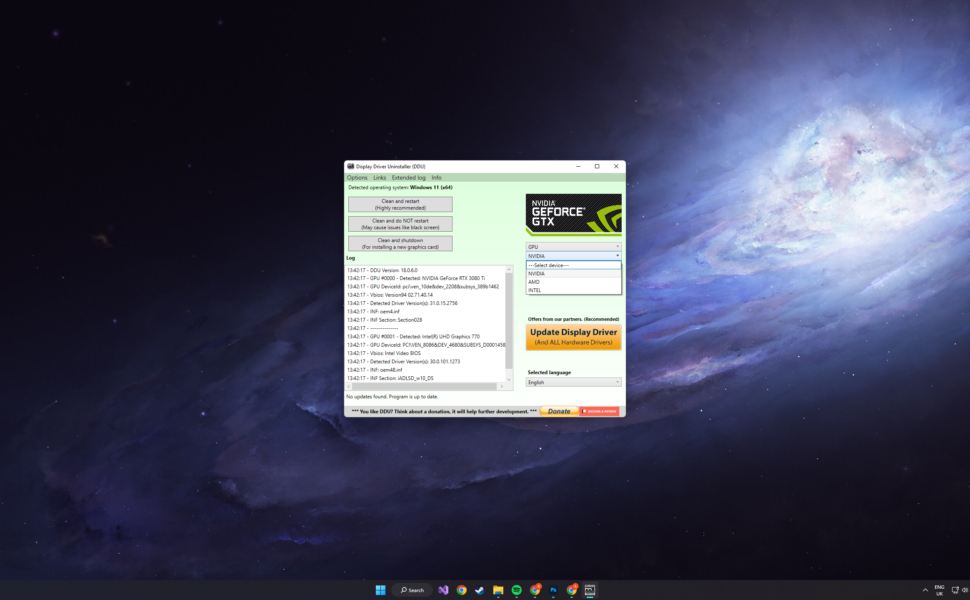

Now that you have booted into Safe Mode, we just need to adjust a couple of settings to enable DDU to do its job effectively;
On the right side, from the first dropdown, please select the option GPU;
After this, from the second dropdown please select either Nvidia or AMD.
Prevent Windows Installing Generic Drivers
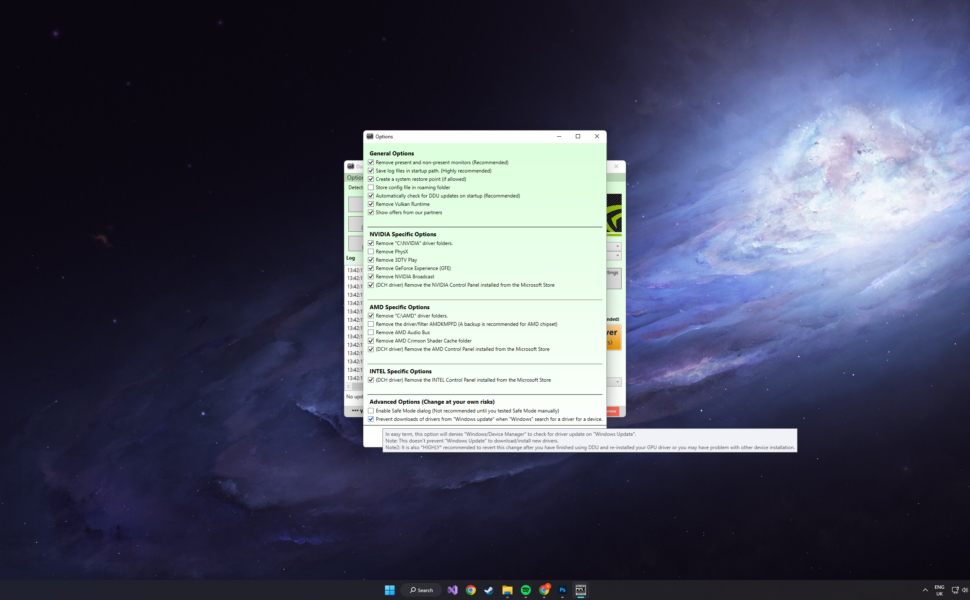

DDU will do a great job cleaning up your old GPU drivers including backups of the installed drivers however, Windows is still able to contact their servers to request a generic driver version to get you up and running fast. These drivers are the absolute basics of what is required to use your hardware so it is never a good idea to use them.
To stop Windows from installing generic drivers once you have restarted your computer;
First, click the ‘Options’ selection from the menu bar at the top menu.
Secondly, at the bottom of the window, make sure Prevent downloads of drivers from “Windows update” when “Windows” search for a driver for a device is checked.
Finish Cleaning Drivers & Restart
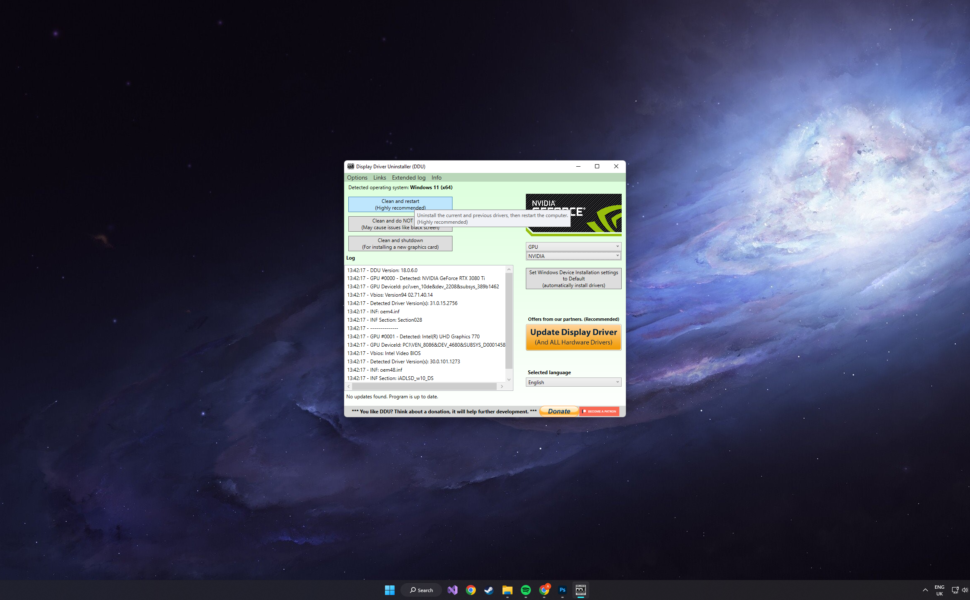

With everything configured properly (and hopefully with you also in Windows Safe Mode), you can go ahead and click the Clean and Restart button located at the top of the window which will get started on cleaning up your system.
Do not be alarmed if your screen flickers, goes black or doesn’t respond for a while – this is normal behaviour when updating your graphics card drivers.
Once completed, your computer will automatically restart itself into normal operating mode ready for the next step.
Install the Latest Drivers for Your GPU
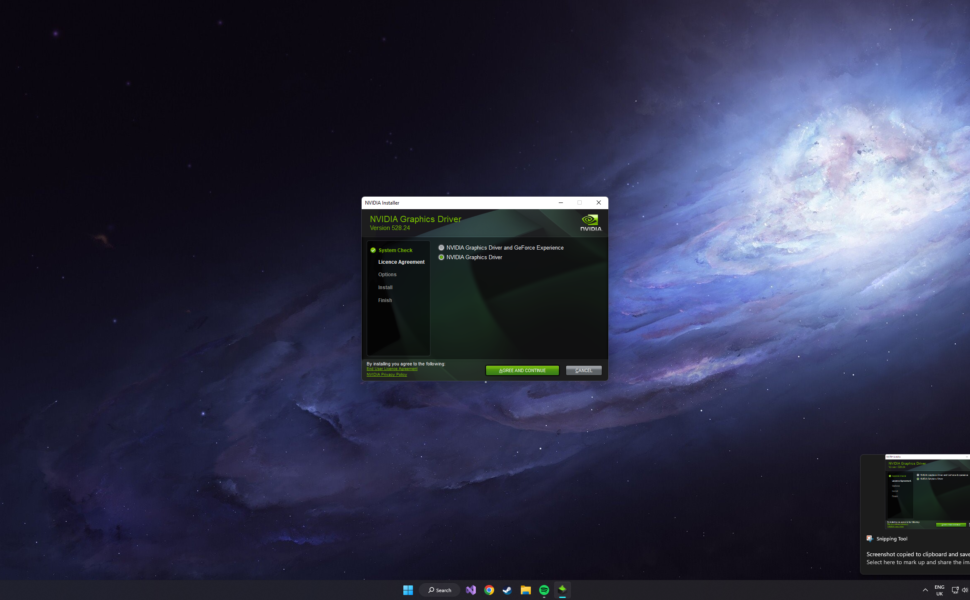

Now that you have properly cleaned up your system of old driver files using DDU by following the steps above and you have restarted your computer, you can now go ahead and run through the installation process for the graphics card drivers you downloaded earlier.
If you prefer to retain control over which drivers you have installed for your graphics card, then we recommend if you’re an Nvidia user to not install the GeForce experience which will automatically update your drivers in the background.
Once drivers have finished installing, restart your PC and you are ready to start gaming.
Final Words
Hopefully, you are all up to date now, running with maximum compatibility and you learnt something new about updating graphics card drivers on Windows today.
Is there something you can teach us about how to update graphics card drivers on Windows we missed? Let us know in the comments